Bitsmore360 - Top trends, Tech News, Tips and Tricks: How-to
Showing posts with label How-to. Show all posts

How to make UPI payment without internet - 2022 guide

In this article, we will learn a simple way to make UPI payment without internet - 2022 guide. Have you ever had such a situation? When you are making a payment to a friend or someone else through mobile UPI, and then the internet connection gets interrupted or your internet speed slows down. Your payment could not be done because of this reason. If yes then this article is for you!

make UPI payment without internet - 2022 guide

How to make UPI payment without internet - 2022 guide


Make UPI payment without internet 

  • Setting up UPI payments is quick and easy.
  • To set up UPI payments, you need a mobile number linked to your bank account. On your smartphone, dial *99#.

make UPI payment without internet - 2022 guide


  • Then choose the language you want and then enter your bank name or first 4 letters of your bank IFSC.
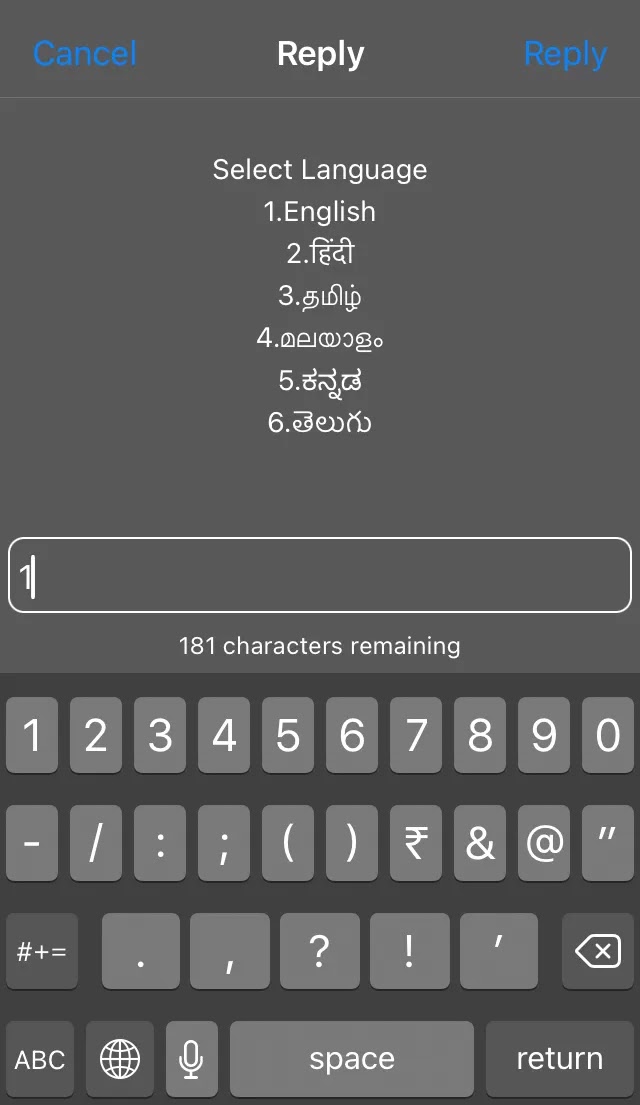
make UPI payment without internet - 2022 guide


  • A list of Bank name will be displayed. Select the bank name.
  • Enter a last 6 digits of your debit card with the expiry date separated by single space.
  • Now you have successfully finished setting up of UPI.


For Payment

  1. On your smartphone or feature phone, dial *99#.
  2. Choose from the option displayed.  Press 1 for mobile number or 3 for UPI Id option.
  3. After Selecting UPI ID option. Enter UPI ID of the person you want to send money.
  4. Then Enter the amount.
  5. Enter UPI Pin to confirm.
  6. And you have successfully made the payment using UPI without internet.

UPI 123PAY: 

It is an instant payment system developed for users who use feature phones. It allows people with a feature phone to securely make UPI payments without the internet. 

Following are the steps to make payment:-

  1. On your feature phone, dial any of the given number:-
  2. 080 4516 3666 / 6366 200 200 / 080 4516 3581.
  1. Choose from the option displayed.  
  2. After Selecting UPI ID option. Enter UPI ID of the person you want to send money.
  3. Then Enter the amount.
  4. Enter UPI Pin to confirm.
  5. And you have successfully made the payment using UPI without internet.

For more information: https://www.npci.org.in/what-we-do/99/product-overview
For more information: https://www.npci.org.in/what-we-do/upi-123pay/product-overview
Did you find this article helpful? OR Have any doubt, write in the comment section. To learn more about Bitsmore360, check out the rest of our Blog, and visit our Pinterest site and follow us on Instagram.

Read More »

How to remove EXIF Data from photo [Easy Guide]

In this article, we will learn a simple way to remove EXIF Data from photo [Easy Guide]. Every image has some information attached to it. The information held by the image is known as Meta Data. Whenever we click a picture using a camera or smartphone, metadata is attached to it. The metadata is also known as Exchangeable Image File Format (EXIF). EXIF file holds information like device model, manufacturer, geolocation, date, and time. We can easily see the EXIF Data of an image just by right click on the image file, then clicking on the properties option of an image. If we post any image online, the metadata is available for the snoopers. These snoopers can get all the information from the EXIF data. 


How to remove EXIF Data from photo [Easy Guide]


The metadata holds the following kinds of information-

  • Date and time the image was taken
  • Location information (coordinates)
  • Device Model name and manufacturer
  • Settings such as aperture, shutter speed, and ISO speed
  • Whitebalance, auxiliary lenses
  • Name of editing tools used
  • If the image modified


Professional photographers use this data for editing purposes. These data may not be harmful but snoopers can track your location using this data. When we upload image online, snoopers have access to our sensitive information(metadata). From a privacy point of view, we should remove the metadata before uploading it on any platform. In this article, we will learn a simple way to remove EXIF Data from photo [Easy Guide].


How to view EXIF data of an image file


In this session, we will learn a way to view EXIF data of an image. Different OS have different ways to view or edit EXIF data. In windows we can easily view EXIF data where as in MAC we can only view EXIF data easily. To edit EXIF Data we need third party program. We can view EXIF metadata of image files in the following ways. 

Windows
  • Navigate to the folder containing the image file you wish to view.
  • Right-click on the image file
  • Select Properties, then Details.


In MAC we can view EXIF metadata of image files in the following ways:-

  • Select image
  • Press Command + I
  • Click the EXIF tab.

View EXIF data online

We can view EXIF data of an image online. To view just visit the site: https://exifdata.com/ select the image file and click view button. We can also submit the URL of an image file.


Information generated using this tool:-


File Size: 71 kB
File Type: PNG
MIME Type: image/png
Image Width: 1280
Image Height: 720
Compression: Deflate/Inflate


We can also view EXIF data of an image using Google Chrome Extension "EXIF Viewer classic". To view just download and install this extension.


Remove EXIF Data from photo [Easy Guide]


In this session, we will learn a way to delete EXIF data of an image. Different OS have different ways to delete EXIF data. In windows we can easily remove EXIF data where as in MAC we can only edit location data. We can remove EXIF metadata of image files in the following ways.

Windows:-
  • Navigate to the folder containing the image file you wish to view.
  • Right-click on the image file
  • Select Properties, then Details.
  • Click on Remove properties and personal information.

MAC:-

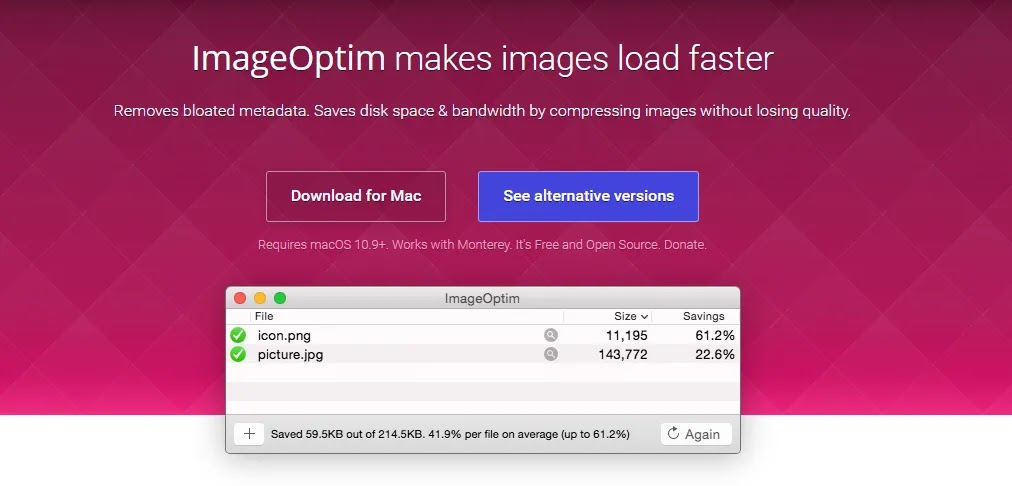
Mac users will need third-party programs such as ImageOptim or EXIF Purge to remove EXIF Data.
  • Download ImageOptim App
  • View Preferences, adjust the settings
  • Drag image to the ImageOption Application window.


remove EXIF Data from photo on MAC

Source: ImageOptim


In Android and IOS devices we can easily turn off the geolocation tag option to prevent adding location information. But this will not delete any other metadata stored with the image file. We can easily view EXIF data on smartphones just by clicking on the details option.

Some of the most commonly used photo metadata viewer tools


  • Regex
  • Exifdata
  • Metadata2go
  • Metapicz
  • Jimpl
  • EXIF Spy
  • Opanda IExif
  • Faststone Image Viewer
  • Exiftool
  • EXIF Pilot
  • ExifPro
  • WildBit Viewer
  • HMK EXIf Viewer
  • Java Exif Viewer
  • XnView
  • Acute Photo EXIF Viewer


Did you find this article helpful? OR Have any doubt, write in the comment section. To learn more about Bitsmore360, check out the rest of our Blog, and visit our Pinterest site and follow us on Instagram.
Read More »

Convert youtube video to pdf [2022 Guide]

In this article, we will learn a simple way to convert youtube videos to pdf. This article is helpful for bloggers, students, and lecturers who make notes from youtube. There are too many contents available on youtube but playing every content and making notes is not a better option. So to save time, I am sharing these simple steps to convert youtube videos into pdf.


Convert youtube video to pdf [2022 Guide]

Convert youtube video to pdf [2022 Guide]


In this tutorial, inorder to convert youtube video to pdf we will use a website Videoglance.com. This tool captures the video from its url and converts it into a pdf.  When we paste YouTube video URL immediately, there appears a preview of that video. We can download the converted file easily.


Steps to convert youtube video to pdf


  • Step1: Open Youtube.
  • Step2: Select any video you want to convert.

Convert youtube video to pdf [2022 Guide]

convert youtube video to pdf


  • Step3: Copy URL of the video.
  • Step4: Visit Videoglance.com.
  • Step5: Paste your Url to convert the youtube video to pdf.
  • Click on Start Capture.

Download YouTube video

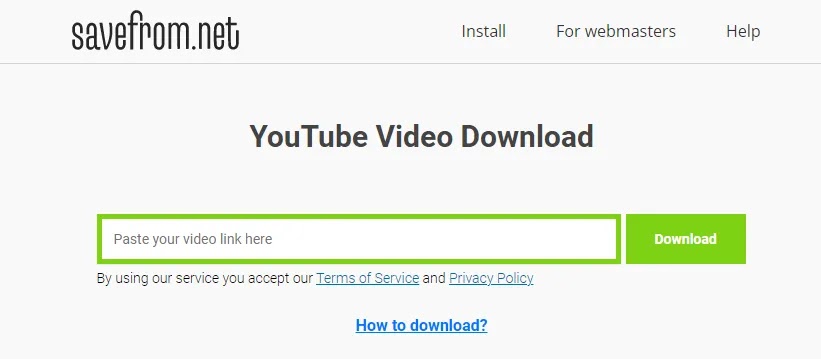
In this session, we will learn a simple way to download YouTube videos. We can download YouTube videos easily by using "savefrom.net" tool. SaveFrom.net provides the fastest way to download YouTube videos in mp4 and mp3 for free. Users can download any number of videos using this tool, There are no limits. Users can download YouTube videos in SQ, HD, Full HD, 2k, and 4k. Following is the step-by-step process download YouTube videos:- 


Download YouTube video

  • Step1: Open YouTube.
  • Step2: Select any video you wish to download. Copy its URL.
  • Step3: Open savefrom.net site.
  • Step4: Paste URL. Select the format and click download button.

We can also download YouTube videos by adding "ss" before the word YouTube in its URL. Adding of word "ss" will directly take us to the savefrom.net site. 

Download YouTube video thumbnail

In this session, we will learn a simple way to download YouTube video thumbnails. Thumbnails are one of the most important content that grabs viewer's attention. It also helps in increasing views on YouTube. Many applications allow the user to download YouTube thumbnails. To download thumbnails in high quality you can use youtube-thumbnail-grabber.com. This site allows the user to download thumbnails easily for free. It also allows users to download Vimeo thumbnail images.


Did you find this article helpful? OR Have any doubt, write in the comment section. To learn more about Bitsmore360, check out the rest of our Blog, and visit our Pinterest site and follow us on Instagram.

Read More »

How to set password on WhatsApp Web [2022 guide]

We all know WhatsApp is one of the most widely used and secure chat applications. We use WhatsApp on our mobile phones as well as in PC. We put passcode in mobile and use 2 factor authentication as security measures. WhatsApp provides us with the WhatsApp Web feature. The feature has proven to be quite helpful for all the people who use Laptops and PC. It makes them easier to stay updated and chat with other people during working hours. But sometimes, people forget to turn off their PC or Laptops. And intentionally or unintentionally any unknown user reads the private messages. This makes them feel uncomfortable. Read the below tutorial of How to set password on WhatsApp Web [2022 guide]. 


Easy Ways To Learn to Set Password on WhatsApp WebCreate Passwords On WhatsApp web Web 2022 guide

Learn to set password on WhatsApp Web [2022 guide]


We can protect us by setting a password on WhatsApp web. Many people don't know to set password on WhatsApp Web. WhatsApp Web Plus is a solution for the above problem. WhatsApp Web Plus is a chrome extension which allows user to set password on WhatsApp Web. It also provide many useful features which will be discussed below. In the below tutorial of How to set password on WhatsApp Web [2022 guide], it is discussed how we can secure our conversation while using WhatsApp Web on our PC. 


About WhatsApp Web Plus

WhatsApp Web Plus is a google chrome extension. It enhances the capability of WhatsApp Applicaion by providing different advance features like more advance marketing and business tools. 

Download WhatsApp Web Plus https://wawplus.com/en/

It provides some of the following features-
  • Multiple Message Broadcasting
  • Auto Replies
  • Contacts Lists & Groups contact Export
  • Contacts Synchronizing
  • CRM Integration
  • Webhooks

Learn to set password on WhatsApp Web [2022 guide]

  • Open Google chrome. Search for WhatsApp Web Plus extension.
set password on WhatsApp Web [2022 guide]

  • Add it to the chrome browser.
  • Open WhatsApp Web. Click on the extension icon present at the top.
  • Select WhatsApp Web Plus. 
  • Tick mark set screen password option.
set password on WhatsApp Web [2022 guide]


Tips to make a secure password

  • Password should be of at least 10 char.
  • It should contain Uppercase and lowercase.
  • It should contain one number and one special characters.
  • It should not contain any thing related to you. Like your personal phone number, Date of birth etc.

Some Funny Password Ideas

  • ElementaryMyWatson
  • MyPreciousssPasssword
  • HoustonWeHaveAProblem
  • LifeIsLikeABoxOfChocolates
  • YouCantHandleThePassword
  • NobodyPutsBabyInACorner
  • YouHadMeAtPassword
  • InternetTheFinalFrontier
  • PasswordKarmaChameleon
  • ChewieWereHome
  • SayHelloToMyLittleFriend
  • HastaLaVistaBaby
  • IllBeBack
  • ThereIsNoSpoon
  • FranklyMyDear
  • HappyBirthdayMrPresident
  • WellAlwaysHaveParis
  • GoAheadMakeMyDay
  • NotInKansasAnymore
  • TheForceIsStrongInThisOne
  • BigMacforevah
  • MacIsForWoosies
  • TheAxeEffect
  • Tastetherainbow
  • justdoit
  • HaveaBreakHaveaKitKat
  • NoMoreRockyRoads
  • Pepsinotcola
  • ImsuchaGAPgirl
  • CowabungaDude
  • DontGoogleThis
  • Ilovepopsicles
  • MacLippies
  • HakunaMatata
  • MotherOfDragons
  • TheOneAndOnlyleesi
  • AryaStarkWasHere
  • FedoraTheExplorer
  • XeroxThis
  • NotOnMySwatch
  • Fishyredherring
  • whistleblower101
  • YouCantGuessThis
  • SnowdenIntelInside
  • BlackHatCat
  • TheItchyAndScratchyShow
  • Lagertha
  • OneDoesNotSimplyLogIntoMordor
  • DHARMAInitiative
  • ZergersGonnaZerg
  • SpeakFriendAndEnter
  • PrincessofBelAir
  • Irecodedthis3times
  • ShiftingKeys
  • MacheteDontPassword (Love this one!)
  • snoopysecret
  • testingtime
  • OcuppyInternetStreet
  • RaidersoftheLostDark
  • BaldursGateway
  • Rajastan895
  • WhiteWalker
  • WeForgotKevin
  • TheyCallMeTrinity
  • Cyberwinter
  • SilentWinter
  • NuclearDeath
  • ToBoldlyGo
  • TheVoyagerAppolo
  • PlatinumConundrum
  • BatmanAndRobbin
  • HarleyQuinnForQueen
  • P@$$w0rd
  • JackAndJillRunUpTheHill
  • FoundaUnicornNamedItFluffy
  • MomFreudWouldBeProud
  • TheyRWatching
  • DropItLikeItsHotspot
  • MermaidsDontDoHomework
  • IAmTheRealZuckerberg
  • IKnowHowToSpell
  • ICanTypeReallyFast
  • TheElderMouseScrolls
  • WorldOfNetcraft
  • ThrallforWarchief
  • Dirgoooo
  • gingereinstein
  • yourdigitalfantasy
  • QAsnipercsgo


Read the above tutorial of How to set password on WhatsApp Web [2022 guide], implement this method to secure your WhatsApp Web Chat. Comment below your favourite names which you are going to use in future.

Also Read:  "How to use DigiLocker through WhatsApp - 2022 Guide"

Also Read: How to delete Snapchat account permanently


Read More »

How to delete Snapchat account permanently - Bitsmore360

Delete Snapchat account permanently | Using PC | Mobile Devices

Sometimes we get bored of using some social media app or we just want to stop using it for some time. We just delete the app rather than deleting the account. Deleting the app does not delete the data stored by the application. Given below are the ways by which you can deactivate your Snapchat account. Deactivating the ID will also completely erase your data.


How to delete Snapchat account permanently - Bitsmore360

Also Read: Free antivirus tool for pc | Best tools for removing virus from Windows PC


How to delete Snapchat account permanently using PC

  • Open your Snapchat account on your PC.

delete Snapchat account permanently - Bitsmore360


  • Visit the link. And login.
For Snapchat login: Visit

  •  Click on Account setting option.
  • Then click delete my account.
  • Type in your login details to verify the deletion process.
Your Snapchat account will get deleted. After deletion, you have 30 days for reactivating your account using the same user id and password. After 30 days, your data will be deleted completely.


How to delete Snapchat account permanently using Iphone

  • Open Snapchat. Click on the setting icon.
  • Scroll down for the Account Action Section.

How to delete Snapchat account permanently 2 - Bitsmore360


  • Select the Delete Account option.
  • Type the account details for confirmation.

Read More »

How to track your mails - Mail tracker for your gmail 2022 Guide

Mail Track

Many times when we send emails to others, we anxiously wait for a response from people. What if I tell you that now you don't have to wait for the response? Yes, you heard it right. There are many software that allows us to track the emails sent to others. This software not only gives us a delivery report but also tells us the number of times the emails sent were opened. Mailtrack is one such software. let us read in detail.

How to track your mails - Mail tracker for your gmail 2022 Guide


Download MailTrack.io https://mailtrack.io/en/


About Mailtack.io

Mailtrack.io application was developed to track emails. It was introduced with the purpose of mail tracking. Its special features also help individuals in marketing.

Features

  • Real-time email tracking features
  • Secure Data
  • Get Daily Report
  • Filter out unread mails
  • Get Mail not opened reminders notifications
  • and much more

How to track your mails?

  • Visit Mailtrack.io. Sign up. Download and install the application.
  • After Install, connect Mailtrack.io. Give permissions.


How to track your mails - Mail tracker for your gmail 2022 Guide 2


  • Choose the plans. Free plans are also available for the users.
  • Visit the Mailtrack.io dashboard by clicking on the top icon.
  • Now you are ready to track your emails.


Mail tracker for your gmail 2022 Guide


The free version comes with a signature means your receiver will also be notified about the email tracking software.

Read More »

How to use DigiLocker through WhatsApp - 2022 Guide

DigiLocker:

DigiLocker is an online service started by Ministry of Electronics and Information Technology, Government of India. User through DigiLocker can download their Aadhaar Card, Voter ID, PAN Card, Driving License, 10 and 12th Marksheet. DigiLocker Service also allows user to get free storage space of 1gb. Users can also use Digilocker through WhatsApp. 

How to use DigiLocker through WhatsApp - 2022 Guide


For More Information: Click


How to Get DigiLocker through WhatsApp - 2022 Quick Guide

Step 1: Save Mygov help desk contact no +91-9013151515.
Step 2: Open WhatsApp. Search for MyGov Help desk number.
Step 3: Open Chat. Send 'Hi', 'Namaste', or 'DigiLocker' to get a reply from chatbot.
Step 4: The chatbot will show different option available for the users.
Step 5: Tap on DigiLocker services. Tap 'Yes' when asked by the chatbot.
Question asked by the chatbot: If you have a DigiLocker account.
Step 6: Type 12 digit Aadhaar when asked by the chatbot in order to confirm and authenticate DigiLocker account services on WhatsApp.
Step 7: Type OTP. Once confirmed, the chatbot will show all the documents available for download.

Documents available for download

  1. PAN card
  2. Driving License
  3. CBSE Class X Passing Certificate
  4. Vehicle Registration Certificate (RC)
  5. Insurance Policy - Two Wheeler
  6. Class X Marksheet
  7. Class XII Marksheet
  8. Insurance Policy ( Life and Non life available on digilocker) Documents

DigiLocker Site: https://www.digilocker.gov.in/


Read More »